Valve cover and nearby seals
Oil around the upper engine may come from the cover gasket, a damaged cover or nearby components. Check the sealing surface and ventilation system where relevant before assuming a gasket alone will solve it.
Oil spots under the car, a burning smell or oil around the engine? Mechanics traces the leak, explains the failed seal or component and provides a written repair quote.
Oil leak repair guide AED 300–1,000
Major access work and multiple leaks can cost more. Confirm diagnosis, parts, labor and VAT before approval.
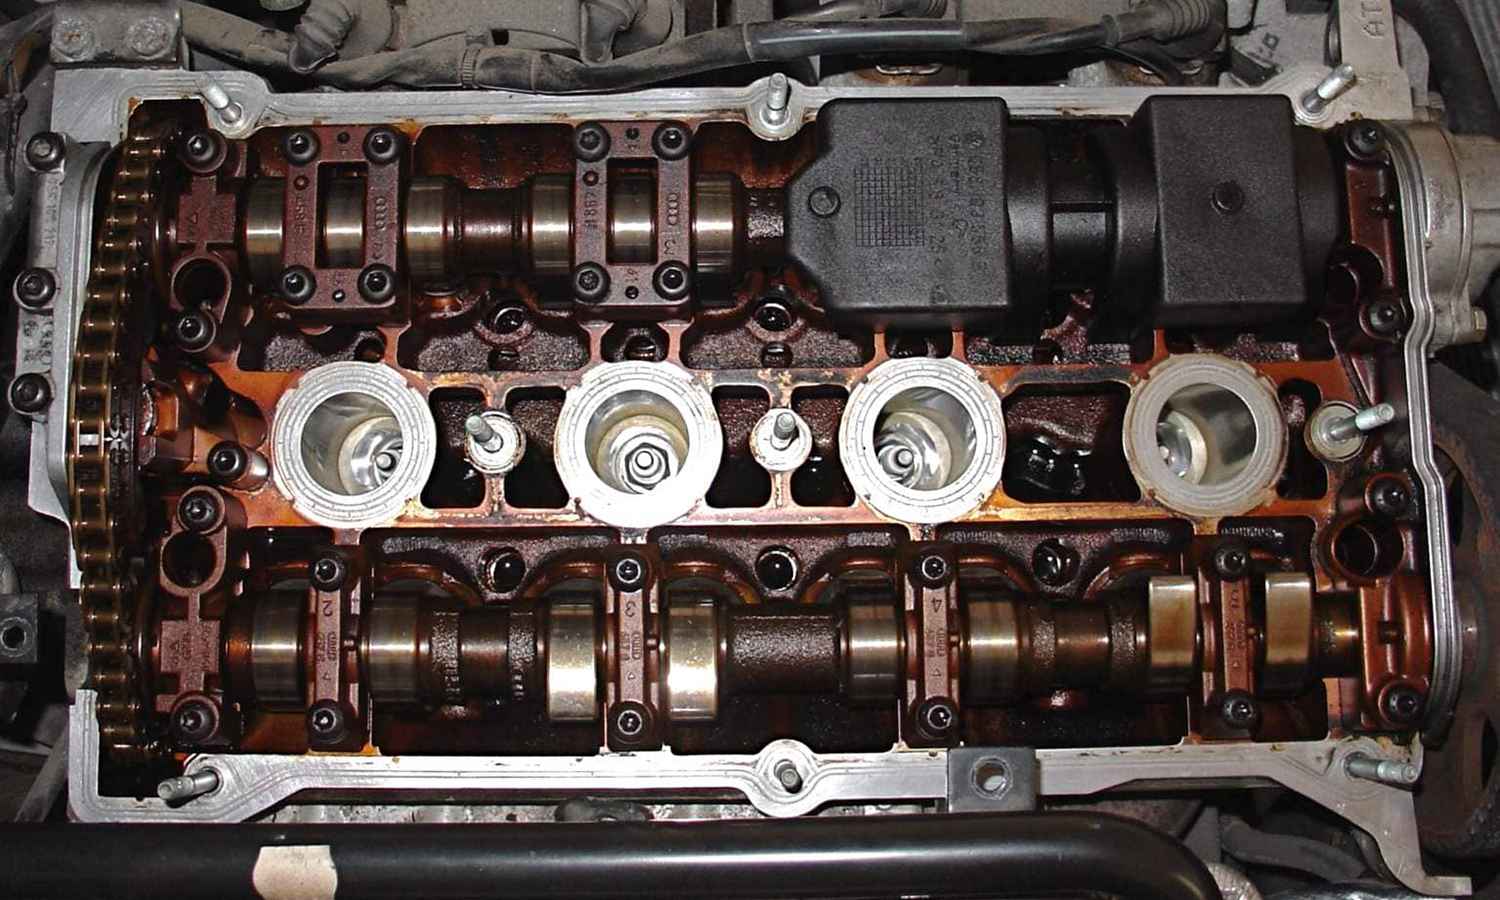
A leak repair should follow the evidence. Several wet areas can come from one source, while some cars have more than one active leak.
Oil around the upper engine may come from the cover gasket, a damaged cover or nearby components. Check the sealing surface and ventilation system where relevant before assuming a gasket alone will solve it.
Oil filter seals, housing joints, cooler connections and drain fittings need inspection. If the leak began after servicing, share the invoice and when the first fresh oil appeared.
Oil collecting on the sump may have traveled down from higher up. The pan, sealing joint, drain plug and threads should be checked once the actual source is clear.
Oil at the engine-to-gearbox joint does not by itself prove a rear main seal failure. Confirm where the fluid originates before agreeing to access-intensive removal work.
On turbocharged engines, oil feed and return connections may also need checking. A recurring leak can justify checks of crankcase ventilation and pressure where the findings support them.
Oil can run along covers or collect in an undertray before reaching the ground. Its color and position are clues, but the fluid and source need confirmation. A clean area followed by an appropriate recheck can be more useful than guessing from one photograph.
A filter-area leak and a rear crankshaft seal are different jobs. The quote should explain the finding and the work needed to reach it.
This guide covers a range of seal, gasket and hose repairs. It is not a fixed package, a price ceiling or a quote for every crankshaft seal and major engine reseal.
Confirm the parts, labor, diagnostic work and VAT included in your vehicle-specific written total.
The part price is only one element. Removing a cover, moving surrounding components or accessing the rear of the engine can account for much of the work. Several leaks, damaged housings or contaminated parts can add to the cost.
| Repair category | What affects the estimate | What should be itemized |
|---|---|---|
| Filter seal, drain fitting or accessible gasket | Condition of the housing, threads and mating surfaces. | Required seal or component, fitting and any fluid correction. |
| Cover, oil cooler or sump reseal | Removal access, damaged covers and vehicle-specific sealing requirements. | Gasket or approved sealant, required fittings, labor and leak checks. |
| Rear main seal or major access work | Transmission or other major-component removal where required. | Confirmed seal location, access, related parts and the complete fitted total. |
| Several leaks or suspected engine damage | Separate faults, oil-pressure concerns and any further tests needed. | Staged diagnosis and an agreed repair plan rather than one open-ended estimate. |
A free initial inspection does not make extended diagnosis, cleaning for leak tracing, dismantling or repairs free. Confirm any investigation charge before authorizing it.
Share the exact message or a photo of the warning when it is safe to do so. Oil pressure, oil level and an oil-change reminder are different signals. Follow the instructions for your vehicle rather than judging urgency by an icon alone.
Pull over safely and switch off the engine if an oil-pressure warning appears while it is running. Do the same for heavy leakage, smoke or oil reaching hot components. Contact the workshop about recovery. Do not keep restarting the engine to see whether the warning disappears. If there is fire or heavy smoke, move away from the vehicle and contact emergency services.
A light seep with a stable oil level is different from a growing puddle. Tell us how quickly it returns, whether there is a warning or burning smell and what the level reading shows. Driving advice depends on the leak and the vehicle, not the size of one stain alone.
Follow the handbook for the correct oil-level check, whether it uses a dipstick or electronic display. Do not crawl under a car supported only by a jack or reach near hot or moving parts. Adding oil does not repair a leak or prove that oil pressure is safe.
A scan can help investigate related warnings, but it does not locate every external oil leak. Mechanical inspection remains important.
Review oil-level changes, recent servicing, warning messages and where fluid appears. Engine oil, transmission fluid and other vehicle fluids need different repair plans.
Inspect accessible areas and the underside as needed. Controlled cleaning and a recheck may be necessary. A compatible tracing method can be considered for a difficult intermittent leak.
Show the finding where practical and explain whether a seal, housing, pipe or related fault needs attention. Approve access, parts and any further dismantling first.
Set the correct oil level and inspect the repaired area under suitable operating conditions. Explain any remaining leak, further observation or follow-up that is needed.
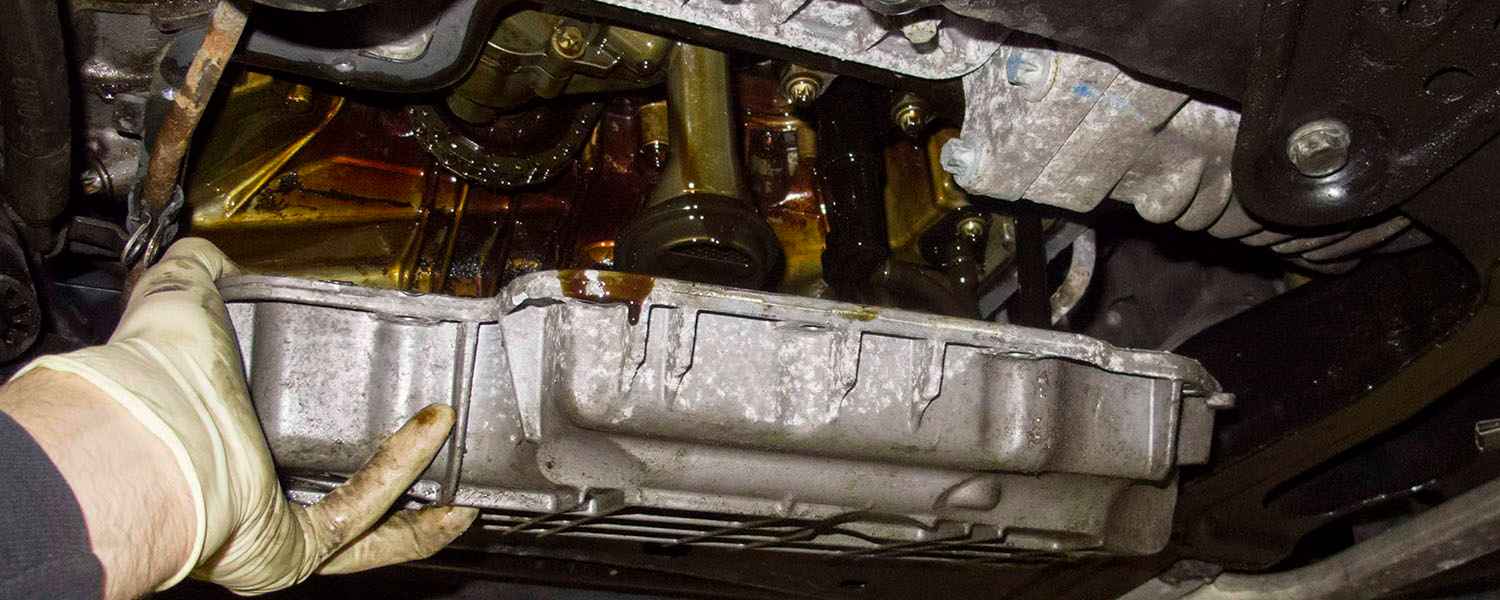
A leak may appear only when the engine is warm, after a drive or following a longer parked period. If it cannot be reproduced during the first check, agree the next step and cost before more investigation.
An accessible repair may be completed within a day once parts are available. Major access work, several leaks or additional damage can require longer. Confirm the schedule after diagnosis rather than relying on a universal same-day promise.
Tracing the source comes first. If the rear main seal is confirmed as the cause, the quote can cover the specific replacement work and access it requires.
The rear main seal sits at the rear of the crankshaft. Oil from a higher leak can travel toward the same area, so the seal should not be condemned solely because the bottom of the engine-to-transmission joint is wet.
Once a rear crankshaft leak is established, see our rear main seal replacement service. Access depends on the seal design and drivetrain, and can involve transmission removal.
Sealing-surface condition, correct installation and crankcase ventilation can matter to the result. Replacing the seal without addressing a relevant underlying problem can leave the car with another leak.
On a manual-transmission car, oil contamination may also affect the clutch. Related work should be assessed and quoted separately, not automatically added to every rear seal job.
Bring previous repair information. It can help separate a recurring fault from a different leak and avoid repeating work without evidence.
Residual oil from a previous spill can leave marks or a smell, but new oil should not be dismissed without checking. Inspect the filter sealing area, housing, drain plug and nearby surfaces, then recheck where necessary.
Share the date, mileage and invoice for the recent oil change. A further oil change is not a substitute for repairing a failed seal, damaged thread or housing.
An undertray may retain leaking oil, or the engine may be consuming it internally. A falling level alone does not establish which is happening. Record the top-up amount and mileage and arrange a check.
Where the findings suggest an oil-pressure problem, internal oil consumption or damage after low-oil running, the next step is the relevant engine diagnosis and repair.
A stop-leak product cannot identify the failed component or correct a cracked housing and damaged sealing surface. Discuss any additive already used and follow the vehicle manufacturer’s guidance before adding another product.
Fluid color changes with age and contamination. The system and source must be identified before choosing a repair.
Air-conditioning condensation can be normal. If you are unsure, describe where it appears and when. Appearance alone cannot confirm every fluid.
Transmission and differential fluid can leak around the driveline. These require the appropriate system assessment, not an engine seal selected from a driveway mark.
Do not drive with compromised braking. Arrange recovery and have the braking system checked. Avoid handling or tasting an unknown fluid to identify it.
The quality of preparation and installation matters alongside the replacement part. A new seal cannot compensate for an unresolved damaged surface.
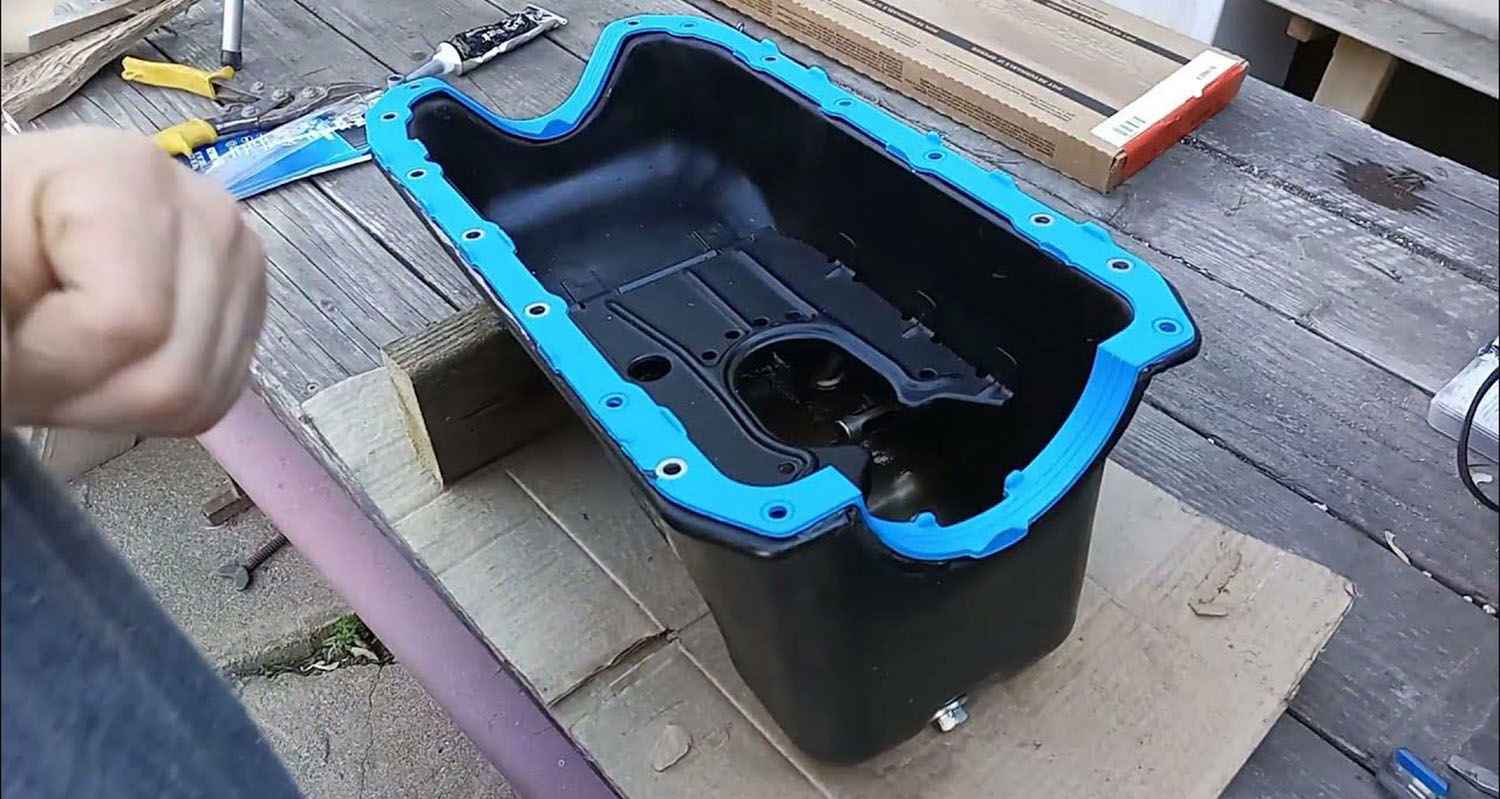
Confirm the engine variant and the exact leaking component. A cover may need only a gasket if it is sound, while a cracked or distorted housing can require replacement. Rubber and PTFE seals have different installation requirements.
Replacement is included when the repair requires it or the service is due and approved. Use the correct engine-oil specification and quantity. Do not assume every external leak repair includes a complete oil service.
Ask for the repaired component, parts used, work completed and warranty conditions on the invoice. Confirm the oil level, any required oil or filter replacement, the checks completed and whether a follow-up visit is needed.
If a stain or smell returns, note the mileage, parking position and any warning, then contact Mechanics. Oil trapped in an undertray or left from an earlier spill may complicate a recheck, but fresh oil must be assessed rather than assumed to be harmless residue. Follow the stop-driving advice if pressure warnings, heavy leakage or smoke appear.
Repair choices, realistic timing and what to confirm before work begins.
The general repair guide is AED 300–1,000. Major access work, rear main seals, several leaks or damaged components may cost more. Confirm diagnosis, parts, labor, required oil or filter replacement and VAT in the written quote.
That depends on the source, rate of loss and symptoms. Stop safely and switch off for an oil-pressure warning while running, heavy leakage or smoke. Ask about recovery. A small seep still needs assessment and the correct oil-level check.
Usually the first task is to find the leak. An external seal, gasket, pipe or housing can require a specific repair without an engine rebuild. Low-oil damage or internal consumption needs separate evidence and diagnosis.
It may originate from the rear crankshaft seal, another nearby source or a leak higher on the engine. The fluid and starting point must be confirmed before major components are removed.
A scan may identify relevant engine warnings, but most external oil leaks still need visual and mechanical inspection. Cleaning, access or further tracing may be required to locate fresh leakage.
The repaired area should be checked before handover. A slow or intermittent leak may need further observation under agreed conditions. Follow the workshop’s instructions and report fresh oil or a returning warning rather than assuming it is harmless residue.
Use the engine-oil specification required for your vehicle. Changing viscosity or adding a stop-leak product is not a substitute for finding the failed part. Tell the workshop about any product or different oil already added.
Not every leak needs engine removal. Accessible seals and gaskets may be repaired in place, while other jobs require surrounding components, the transmission or the engine to be removed. The confirmed source and the vehicle’s repair procedure determine the access work. Ask for that work to be itemized before approval.